Create Captivating Talking Photo Videos with AI
A Step-by-Step Guide to Animating Images with Custom Voiceovers and Facial Expressions
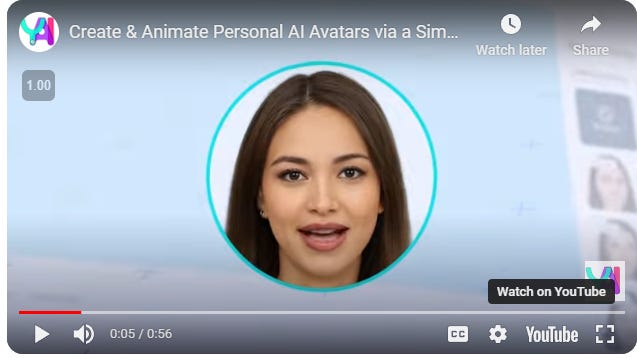
In this expanded edition of our newsletter, we'll do a deep dive into creating engaging talking photo videos from start to finish using AI tools. Whether for social media, promotions, or just for fun, these animated videos can capture attention.
We'll cover:
- Selecting or generating a facial image
- Creating or sourcing voiceover audio
- Animating with leading video AI platforms
- Enhancing through editing
- Sharing your final video
Let's get started!
Finding the Right Facial Image
The foundation of any talking photo video is the still image. You want a high-quality close-up headshot, ideally with the subject looking straight ahead.
If you don't already have a suitable photo, you can generate custom portrait images with AI art generators like Midjourney, DALL-E, or Stable Diffusion. Sites like https://www.midjourney.com/ allow you to describe a person, from hair color and age to outfit and expression. Or you can provide a reference image to base generated options off of.
After prompting the AI art generator, you'll get multiple rendering options to choose from. Select the one you like best, upscale it to high resolution, then download to use in your video. The transcript example generated several AI portraits using Midjourney before picking their favorite.
Alternatively, stock photo sites like Shutterstock offer a wide variety of model-released headshots you can license and use. Look for photos with good color, contrast, framing and clarity. Avoid dark, blurry or low-resolution images.
No matter the source, be sure you have full rights to use the face photo commercially before proceeding. A high-quality portrait will make the difference in achieving convincing animation.
Creating Custom Voiceover Audio
Once you've selected or generated your "spokesperson" image, it's time to give them a voice! The voiceover audio will be used to animate the facial expressions and mouth movements.
You have a few options here:
- Hire a professional voice actor to record custom audio matched to the image and your script. Getting an authentic human voiceover gives the best results.
- Use AI text-to-speech to generate audio from text input. Services like https://www.elevenlabs.io/ offer high quality voices, pacing control and audio exporting. This transcript used ElevenLabs successfully.
- Record your own voiceover if suitable for the subject matter. Use clear speech and adequate pacing in a quiet environment.
Aim to keep the audio clips fairly short - think rows of dialogue or individual paragraphs. This makes it easier to sync with mouth animations later. Breaking up longer scripts prevents robot-sounding extended monologues.
Having compelling, character-appropriate voiceover will make your video engaging. Spend time polishing this essential component before animating.
Animating with Leading AI Platforms
Now for the fun part - bringing your image to life! Today's AI video tools allow generating realistic facial animations from audio or text. Let's look at leading options:
D-ID:
- Upload image and provide voiceover or type text
- Control mouth shapes to match audio
- Generate video preview to download
- Offers free trial and paid plans
- Produces convincing animations
- Some loss of image quality
- Upload image and add voiceover or text
- Choose AI voice if using text input
- Includes a handy preview function
- Generous free trial option
- Quick turnaround times
- Very realistic results
- Upload image and provide audio or text
- Add pauses and pick AI voice for text
- Provides multiple pricing tiers
- Faster generation with paid plans
- Intuitive and easy to use interface
- Believable animations
The transcript walks through examples of using voiceover and text input across these platforms. Follow the prompts to configure options, generate previews, then create your video.
Take time to become familiar with the tools and test different inputs. The AI will keep improving with each iteration, so be patient if initial results are not perfect. With the right source assets, high quality output can be achieved.
Refining Animations and Mouth Movement
Upon getting your first AI generated video, review it closely for any areas needing improvement. Pay special attention to how accurately the mouth shapes match the voiceover:
- Look for sections where sounds don't synch with lip movements. For example, closed mouths on open vowel sounds.
- If sentences feel disjointed, try adjusting the voiceover pacing or breaking long lines up.
- Certain voices and enunciation styles may not animate well. Changing voiceover could help.
- For text input, tweak punctuation to improve mouth shapes around pauses.
You may need to re-generate several versions until the mouth movements feel realistic throughout the video. Don't be afraid to experiment and guide the AI - the technology keeps getting more sophisticated every day.
Evaluating Facial Expressions
In addition to mouth synchrony, look closely at the subject's generated facial expressions and movements to see if they feel natural:
- Do random blinks and small fidgets mimic human behavior? Or is the face too static?
- Do any emotions or emphasis match the voice inflection? Subtle raises of eyebrows can help.
- Can you adjust the voiceover pacing or add dramatic pauses to drive more expressions?
A more dynamic voiceover will inherently create richer animations. But you may also try regenerating just the expressions layer itself through the AI tools while keeping the same mouth movements.
Again, don't hesitate to continually refine until you achieve natural looking results. The AI benefits from your artistic feedback.
Enhancing Through Video Editing
Once you've dialed in smooth, realistic animations, consider taking the video further with editing. Programs like Adobe Premiere, Final Cut Pro, DaVinci Resolve, or open source options like OpenShot give you creative control to:
- Tighten up pacing and cut extraneous footage
- Add graphics like titles, logos, and lower-thirds
- Incorporate B-roll video or stills for more visual interest
- Change aspect ratio or apply color correction
- Add stylistic touches like camera moves or transitions
- Mix in background music and sound effects
This editing polish can elevate an already solid base video to have more production value. Use it to incorporate branding or embellish the runtime if needed.
Sharing and Promoting Your AI Creation
The final step is getting your slick animated talking photo video out into the world! Export a high quality file and upload to platforms like:
- YouTube
- Social media like Facebook/Instagram/TikTok
- Your company website and blog
- Marketing landing pages and banners
- Video content sites like Vimeo
Add engaging titles, descriptions and tags to help surface the content. Promote the video through your online networks, email newsletters, and other channels. Add a watermark and enable downloads to brand and track its spread.
Monitor metrics like views, shares and engagement. See which title thumbnails and where you share resonates best with your target audiences. Use these lessons to inform future video content plans that captivate viewers.
The possibilities are endless for putting AI-powered facial animation to creative use across so many contexts. We hope this guide gave you an in-depth look at the end-to-end process for conceiving, generating and sharing compelling talking photo videos. Let us know if you have any other questions!


